How to Use a Self-Service Car Wash: Washing, Rinsing, & Drying
Having a clean and shiny car not only enhances its appearance but also helps protect its paint and finish. While professional car washes are a convenient option, self-service car washes provide an affordable alternative that allows you to take matters into your own hands. In this article, we will guide you through the process of using a self-service car wash, from washing and rinsing to drying your vehicle, ensuring that you achieve a sparkling clean result.
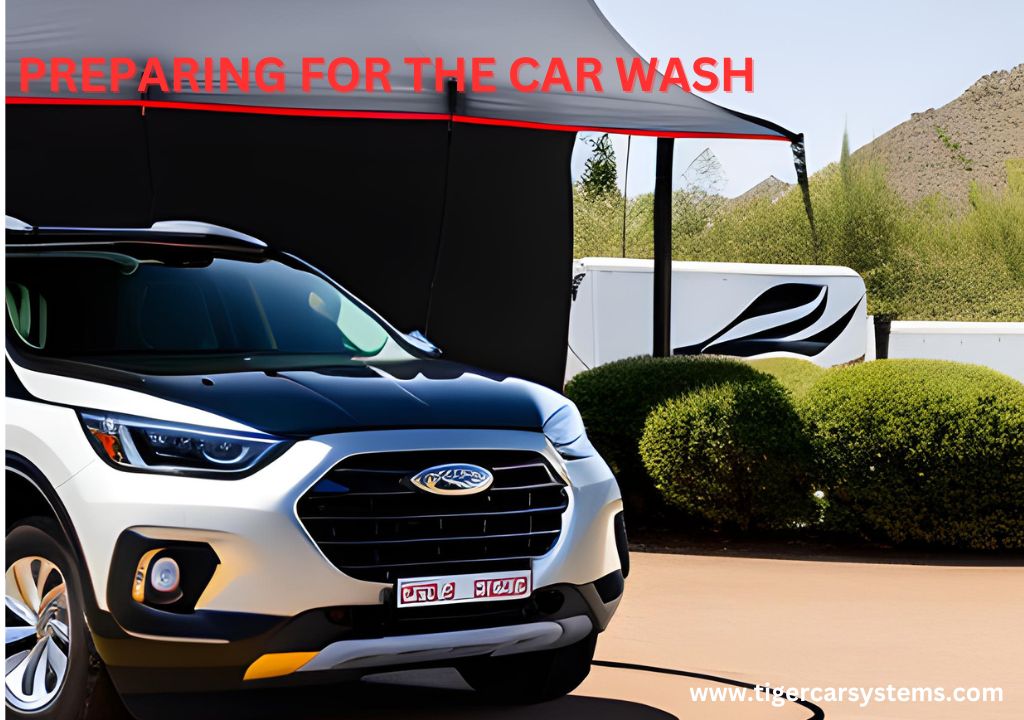
Preparing for the Car Wash
Taking the time to properly prepare before heading to a car wash can make the experience more efficient and effective. By following a few simple steps, you can ensure that your car wash goes smoothly and that you achieve the best results. Here are some tips to help you prepare for the car wash:
- Empty Your Vehicle: Before you head to the car wash, take a few minutes to remove any personal belongings, trash, or loose items from your vehicle. This will make it easier to clean the interior and ensure that nothing gets damaged or lost during the process.
- Check for Damage: While you're preparing your vehicle for the car wash, it's a good idea to inspect it for any existing damage. Look for scratches, dents, or other imperfections that may require special attention or extra care during the wash. Taking note of these areas will help you avoid further damage and allow you to focus on them during the cleaning process.
- Gather the Necessary Supplies: Depending on the self-service car wash you choose, you may need to bring your own supplies or have the option to purchase them on-site. Common supplies include car wash soap, microfiber mitts or sponges, a bucket, glass cleaner, drying towels or microfiber cloths, and wheel cleaner. Check with the car wash beforehand to see what they provide and what you need to bring.
- Familiarize Yourself with the Car Wash Equipment: Each self-service car wash may have slightly different equipment and controls. Take a moment to familiarize yourself with the control panel and understand how to operate the different settings and options available. This will ensure that you have a smooth experience and can efficiently navigate through the wash process.
- Dress Appropriately: It's important to wear clothing that you don't mind getting wet or dirty during the car wash. Opt for comfortable and lightweight attire that allows freedom of movement. Closed-toe shoes are also recommended to protect your feet while you're around wet surfaces and potentially slippery areas.
- Bring Change or Payment Method: Most self-service car washes require payment, either in the form of coins or a card. Make sure you have enough change or a valid payment method with you to avoid any delays or inconvenience at the car wash.
- Plan for the Weather: Consider the weather conditions before heading to the car wash. If it's a hot and sunny day, you may want to go earlier in the morning or later in the evening to avoid water spots and the soap drying too quickly. On the other hand, if it's cold outside, ensure that you dress appropriately and consider bringing gloves to protect your hands from the chilly water.
By taking these preparatory steps, you can ensure a smoother and more efficient car wash experience. Proper preparation will help you achieve the best results and make the most out of your time at the self-service car wash.
Washing Your Car

Pre-rinsing the car: When it comes to washing your car at a self-service car wash, starting with a thorough pre-rinse is an essential step. Pre-rinsing helps remove loose dirt and debris from the surface of your vehicle, making the subsequent wash more effective. By following a few simple steps, you can ensure that your car is properly pre-rinsed before moving on to the main washing process. Here's how to pre-rinse your car:
- Select the Pre-Rinse Setting: Once you're at the self-service car wash station and have familiarized yourself with the control panel, locate and select the pre-rinse setting. This setting is typically represented by a water spray icon or labeled "pre-soak" or "pre-wash."
- Position the Nozzle: Grab the high-pressure hose with the nozzle attached and position it at a suitable distance from your vehicle. It's generally recommended to keep the nozzle about one to two feet away from the car's surface to avoid causing any damage.
- Start from Top to Bottom: Begin pre-rinsing your car from the top and work your way down. This technique allows the water to flow over the entire vehicle, carrying away dirt and debris as it cascades down. Start with the roof, then move to the windows, hood, trunk, and finally the sides and lower parts of the car.
- Focus on Problem Areas: Pay extra attention to areas that tend to accumulate more dirt, such as the front grille, wheel wells, and lower portions of the car. These areas are often exposed to road grime and require more thorough rinsing. Direct the water spray at different angles to ensure a comprehensive cleaning.
- Use a High-Pressure Setting: For effective pre-rinsing, it's recommended to use a high-pressure setting on the nozzle. The force of the water will help dislodge stubborn dirt and debris from the surface of your car. However, be cautious not to use excessive pressure, as it can potentially damage delicate parts or remove loose paint.
- Check for Remaining Dirt: After pre-rinsing, take a moment to inspect the surface of your car for any remaining dirt or debris. If you notice any stubborn spots or areas that need extra attention, you can give them a targeted rinse before moving on to the next steps of the car wash.
- Pre-rinsing your car before the main wash is crucial as it helps remove loose contaminants that could potentially scratch or damage your vehicle's paint during the washing process. Additionally, pre-rinsing makes it easier for the car wash soap to effectively clean the surface, ensuring a more thorough and efficient wash.
By following these steps and taking the time to pre-rinse your car properly, you'll be on your way to achieving a clean and pristine vehicle. Remember to stay attentive and ensure that all areas of your car receive a sufficient pre-rinse, paying particular attention to problem areas.
Applying car wash soap:

Once you have pre-rinsed your car at a self-service car wash, the next step is to apply car wash soap. Using the right technique and quality soap will help lift dirt and grime off your vehicle's surface, leaving it looking clean and refreshed. Here's a step-by-step guide on how to properly apply car wash soap:
- Select the Soap Setting: On the control panel of the self-service car wash, locate the soap setting. It is usually represented by a soap bubble icon or labeled "soap" or "wash."
- Dilute the Soap: If the car wash provides a concentrated soap, dilute it according to the instructions on the bottle. Fill a bucket with the appropriate amount of water, then add the recommended quantity of soap. Gently stir the solution to create a soapy mixture.
- Soak the Wash Mitt or Sponge: Before applying soap to your car's surface, soak a clean, microfiber wash mitt or sponge in the bucket of soapy water. Allow the mitt or sponge to absorb the soap mixture, ensuring it is thoroughly saturated.
- Start from the Top: Begin applying the soap to your car's surface starting from the top. This means starting with the roof and gradually working your way down to the hood, trunk, and sides. By starting from the top, any excess soap or dirt that drips down will be rinsed away during the subsequent rinsing process.
- Use Gentle, Circular Motions: Apply the soapy water to your car using gentle, circular motions. This technique helps to lift dirt and grime off the surface while minimizing the risk of scratching or swirling the paint. Make sure to cover all areas, including the windows, mirrors, and hard-to-reach crevices.
- Pay Attention to Heavily Soiled Areas: Give extra attention to areas that are heavily soiled, such as the front grille, lower portions of the car, and the wheels. These areas may require additional scrubbing or soaking to effectively remove dirt and grime. Use the soapy mitt or sponge to agitate and clean these areas thoroughly.
- Reapply Soap as Needed: Depending on the size of your vehicle and the amount of dirt present, you may need to reapply soap to the wash mitt or sponge during the process. Ensure that there is always a sufficient amount of soapy water on your mitt or sponge to maintain an effective cleaning action.
- Avoid Drying the Soap: While you apply soap to your car, avoid letting it dry on the surface. Work in sections, applying the soap and immediately rinsing it off before moving on to the next area. This prevents the soap from leaving behind residue or streaks on the paint.
- Remember, using a high-quality car wash soap designed specifically for automotive use is essential. These soaps are formulated to be gentle on your vehicle's paint while effectively lifting dirt and grime. Avoid using household detergents, as they can strip away protective coatings and cause damage to the paintwork.
By following these steps and using the proper technique, you can ensure a thorough and effective application of car wash soap. This will leave your vehicle's surface clean and ready for the next step in the self-service car wash process.
Using a sponge or mitt to clean the car:

When it comes to cleaning your car at a self-service car wash, using the right tools is crucial for achieving a thorough and scratch-free clean. A sponge or mitt is a popular choice for applying car wash soap and removing dirt from the surface of your vehicle. By following a few simple steps, you can effectively use a sponge or mitt to clean your car. Here's a step-by-step guide:
- Choose the Right Sponge or Mitt: Select a high-quality sponge or mitt specifically designed for automotive use. Look for products made from soft, non-abrasive materials like microfiber or lambswool. These materials help minimize the risk of scratching or swirling the paintwork.
- Wet the Sponge or Mitt: Before you start cleaning, thoroughly wet the sponge or mitt with clean water. Squeeze out any excess water, leaving it damp but not dripping.
- Apply Car Wash Soap: If you haven't already done so, apply a suitable car wash soap to the surface of your vehicle using the techniques outlined in the previous article. Ensure that the soap is evenly distributed and covers all areas you plan to clean.
- Begin Washing from the Top: Start washing your car from the top and work your way down. This allows any dirt or debris to flow downward, minimizing the risk of scratching the paint. Dip the sponge or mitt into the soapy water and gently apply it to the surface in a back-and-forth or circular motion. Avoid using excessive pressure, as it can increase the risk of scratching.
- Focus on Small Sections at a Time: To ensure a thorough clean, focus on washing small sections of your car at a time. This approach allows you to give proper attention to each area and prevents the soap from drying on the surface before rinsing. It's recommended to work in sections like the roof, hood, doors, and trunk, and move systematically across the vehicle.
- Rinse the Sponge or Mitt Regularly: As you clean, rinse the sponge or mitt frequently in a separate bucket of clean water. This helps remove any dirt or debris that may have accumulated, preventing them from being transferred back to the car's surface. Squeezing the sponge or mitt while rinsing helps expel dirt particles more effectively.
- Pay Attention to Difficult Areas: Give extra attention to difficult areas such as door handles, side mirrors, and crevices where dirt can accumulate. Use the sponge or mitt to reach and clean these areas thoroughly. For stubborn dirt or grime, you may need to apply a bit more pressure, but always be cautious to avoid damaging the paint.
- Rinse Your Car: Once you have washed the entire vehicle, it's time to rinse off the soap. Switch to the rinsing setting on the self-service car wash control panel and use the high-pressure hose to thoroughly rinse your car from top to bottom. Ensure that all traces of soap are removed, paying particular attention to the wheel wells and other areas where soap residue can accumulate.
- By following these steps and using a sponge or mitt correctly, you can effectively clean your car's exterior at a self-service car wash. Remember to always use gentle motions, work in small sections, and rinse the sponge or mitt regularly to avoid scratches or swirl marks. With proper care and attention, you can maintain a clean and shiny vehicle for years to come.
Paying attention to difficult areas:

When it comes to washing your car at a self-service car wash, paying attention to difficult areas is essential for achieving a thorough and complete clean. These areas, often overlooked during the washing process, tend to accumulate dirt, grime, and contaminants that can detract from your vehicle's overall appearance. By focusing on these challenging spots, you can ensure that your car is sparkling clean from top to bottom. Here's a guide on how to pay attention to difficult areas during your car wash:
- Door Handles and Keyholes: Door handles and keyholes are high-touch areas that accumulate dirt, oils, and grime over time. To clean them effectively, use a sponge or mitt soaked in soapy water. Gently scrub the handles, paying attention to any crevices or grooves. You may need to use a small detailing brush or toothbrush to reach tight spots. Rinse thoroughly to remove any soap residue.
- Side Mirrors: Side mirrors are prone to collecting dirt and can affect your visibility while driving. Use a sponge or mitt to clean both the mirror's surface and its housing. For hard-to-reach areas, consider using a soft-bristle brush or a cotton swab dipped in soapy water. Be careful not to apply excessive pressure to avoid damaging the mirror or its adjustment mechanisms.
- Grille and Vents: The front grille and air vents can accumulate dust, debris, and bugs. To clean them effectively, use a soft-bristle brush or a detailing brush. Gently scrub the grille and vents, ensuring that you reach all the openings. Pay attention to any intricate patterns or designs. Rinse thoroughly to remove all dirt and soap residue.
- Wheel Wells: Wheel wells are notorious for collecting road grime, mud, and brake dust. To clean them thoroughly, use a high-pressure nozzle or a dedicated wheel well cleaning tool. Spray water at a downward angle to dislodge dirt and debris. If necessary, use a brush or sponge to agitate the area and remove stubborn grime. Rinse the wheel wells completely to ensure they are free from any cleaning product residue.
- Tires and Rims: Tires and rims can accumulate brake dust, dirt, and grime that can be challenging to remove. Start by pre-rinsing the tires and rims to remove loose debris. Apply a dedicated wheel cleaner and allow it to sit for a few minutes to break down stubborn grime. Use a tire brush or sponge to scrub the tires thoroughly. For rims, use a soft brush or a microfiber cloth to clean each spoke and the surface. Rinse off the cleaner and dry the tires and rims using a clean cloth.
- Bumpers and Trim: Bumpers and trim pieces are often exposed to environmental contaminants and can become dull or discolored over time. Use a sponge or mitt to clean these areas, paying attention to any textured surfaces or recessed areas. Apply a plastic trim restorer to revitalize faded trim and restore its original appearance.
- Hard-to-Reach Areas: Finally, don't forget to pay attention to hard-to-reach areas such as crevices, door jambs, and emblems. Use a detailing brush or a cotton swab soaked in soapy water to clean these spots thoroughly. Pay attention to any areas where dirt and grime tend to accumulate, ensuring they are properly cleaned.
By giving extra attention to these difficult areas, you can achieve a more comprehensive car wash and ensure that your vehicle looks its best. Remember to use appropriate tools and cleaning products for each area, and always rinse thoroughly to remove any residue. With a little extra effort, your car will shine from every angle, and you can enjoy a clean and well-maintained vehicle.
Rinsing off the soap: Completing a Thorough Car Wash

After applying car wash soap to your vehicle during a self-service car wash, the next crucial step is rinsing off the soap. Proper rinsing ensures that all traces of soap, dirt, and grime are removed, leaving your car with a clean and spot-free finish. Here's a step-by-step guide on how to effectively rinse off the soap:
- Select the Rinse Setting: Locate the rinse setting on the control panel of the self-service car wash station. It is typically represented by a water spray icon or labeled "rinse" or "clear coat rinse." Ensure that the nozzle is set to a high-pressure rinse for optimal results.
- Start from the Top: Begin rinsing your car from the top and work your way down. This allows the water to naturally flow downward, carrying away the soap and dirt as it cascades. Start with the roof, then move to the windows, hood, trunk, and finally the sides and lower parts of the car.
- Use a Sweeping Motion: Hold the high-pressure hose with the nozzle at a suitable distance from the surface of your car. Sweep the water in a side-to-side motion, covering each section thoroughly. This sweeping motion helps to ensure that all areas are rinsed properly and that no soap residue is left behind.
- Pay Attention to Crevices and Joints: While rinsing, pay special attention to crevices, joints, and hard-to-reach areas where soap residue can accumulate. Direct the water spray into these areas to ensure a thorough rinse. Use a targeted approach to dislodge any trapped dirt or soap.
- Rinse Wheels and Wheel Wells: Don't forget to rinse your wheels and wheel wells. Aim the high-pressure spray directly at the wheels to remove any remaining soap or brake dust. Pay attention to the inner sections of the wheels and the wheel wells, as these areas tend to collect dirt and grime.
- Check for Soap Residue: After rinsing, take a moment to inspect your car's surface for any soap residue. Look for any areas that may still appear soapy or have a cloudy appearance. If you notice any residue, rinse those areas again to ensure they are completely clean.
- Spot-Free Rinse: To achieve a spot-free finish, consider using a spot-free rinse option if available at the self-service car wash. Spot-free rinse water is typically treated to remove minerals and impurities that can cause water spots to form as the car dries. This step helps minimize the need for additional drying and produces a cleaner final result.
- Dry Your Car: After rinsing off the soap, it's important to dry your car to prevent water spots and streaks. Use a clean, microfiber cloth or chamois to gently dry the surface. Start from the top and work your way down, ensuring that all areas are thoroughly dried.
Properly rinsing off the soap is crucial for completing a thorough car wash and maintaining the appearance of your vehicle. By following these steps and paying attention to detail, you can achieve a clean and spot-free finish that will leave your car looking its best. Take your time, ensure thorough rinsing, and enjoy the satisfaction of a sparkling clean vehicle.
Rinsing Your Car

Using high-pressure water: Maximizing the Effectiveness of Your Car Wash
High-pressure water is a powerful tool when it comes to cleaning your vehicle at a self-service car wash. It can effectively remove dirt, grime, and other contaminants from the surface, providing a thorough and efficient car wash. However, it's important to use high-pressure water properly to avoid any potential damage. Here's a guide on how to maximize the effectiveness of using high-pressure water during your car wash:
- Adjust the Pressure: Most self-service car wash stations offer adjustable pressure settings on their equipment. Before starting, assess the condition of your vehicle and the level of dirt and grime present. Begin with a lower pressure setting and gradually increase it if needed. This allows you to find the right balance between effective cleaning and preventing potential damage to the paint or other delicate surfaces.
- Maintain a Safe Distance: Stand a safe distance away from your vehicle while using high-pressure water. Being too close can concentrate the force of the water, increasing the risk of damage to the paint, trim, or other sensitive areas. Aim to stay around 1-2 feet away from the surface, and adjust the distance based on the pressure and the condition of your vehicle.
- Use Sweeping Motions: When using high-pressure water, employ sweeping motions instead of focusing on a single spot. This helps distribute the water evenly across the surface and prevents concentrated pressure on one area. Move the nozzle back and forth or in circular motions, covering each section thoroughly before moving on to the next.
- Target Difficult Areas: High-pressure water is particularly useful for tackling difficult areas such as wheel wells, undercarriage, and hard-to-reach crevices. Direct the stream of water into these areas to dislodge dirt, debris, and other contaminants. Be cautious not to use excessive pressure in delicate areas or areas with loose components that may get damaged.
- Clean Wheels and Tires: High-pressure water is highly effective for cleaning wheels and tires, which often accumulate brake dust, dirt, and grime. Aim the water stream directly at the wheels and tires, focusing on removing stubborn debris. Adjust the pressure as needed, ensuring thorough cleaning without causing damage.
- Pay Attention to Painted Surfaces: While high-pressure water is great for cleaning, it's important to be cautious when directing it at painted surfaces. Avoid using excessively high pressure or getting too close to the paint to prevent damage or chipping. Instead, use the high-pressure water to rinse off soap or loosen dirt, and rely on gentler methods for actual cleaning, such as a sponge or mitt.
- Mind the Wind Direction: Be aware of the wind direction when using high-pressure water. Wind can cause the water to splash back or blow contaminants onto your freshly cleaned surfaces. Adjust your positioning or timing accordingly to minimize any potential issues.
- Observe the Manufacturer's Guidelines: If your vehicle has any specific recommendations or precautions regarding high-pressure water, such as delicate paint or sensitive areas, it's important to follow the manufacturer's guidelines. Some vehicles may have limitations or precautions that need to be considered during the car wash process.
By using high-pressure water properly, you can maximize the effectiveness of your car wash and achieve a thorough clean. Remember to adjust the pressure, maintain a safe distance, and use sweeping motions to evenly distribute the water. Pay attention to difficult areas, clean wheels and tires effectively, and be cautious around delicate surfaces. With proper technique, high-pressure water can be a valuable asset in your car washing routine.
Cleaning the undercarriage: A Crucial Step in Car Maintenance

When it comes to washing your car at a self-service car wash, one area that is often neglected is the undercarriage. The undercarriage is exposed to various elements, including road grime, salt, mud, and debris, which can lead to corrosion and other issues if left unattended. Cleaning the undercarriage is a crucial step in car maintenance that helps extend the lifespan of your vehicle and maintain its overall condition. Here's a step-by-step guide on how to effectively clean the undercarriage:
- Safety First: Before you start cleaning the undercarriage, it's important to prioritize safety. Put on protective eyewear and gloves to shield yourself from dirt and debris. Ensure that the car is parked on a level surface and that the engine is off.
- Pre-rinse: Begin by pre-rinsing the undercarriage with a high-pressure spray of water. This step helps remove loose dirt, mud, and debris. Use a spray nozzle with a focused stream to reach into hard-to-reach areas.
- Apply a Degreaser: To effectively remove grease, oil, and road grime from the undercarriage, apply a suitable degreaser. You can find specific undercarriage cleaners or all-purpose degreasers designed for automotive use. Follow the instructions on the product label for the recommended application method.
- Use a Long-Reach Brush: To agitate the degreaser and loosen stubborn dirt and grime, use a long-reach brush specifically designed for undercarriage cleaning. The brush should have durable bristles and be long enough to reach all areas of the undercarriage. Scrub the surface thoroughly, paying special attention to areas with heavy buildup.
- Rinse Thoroughly: Once you have thoroughly scrubbed the undercarriage, rinse it off with a high-pressure spray of water. Start from the front of the vehicle and work your way towards the back, ensuring that all the degreaser and loosened dirt is washed away. Pay extra attention to crevices, wheel wells, and other hard-to-reach areas.
- Repeat if Necessary: If there is still visible dirt or grime after the initial rinse, repeat the degreasing and scrubbing process until the undercarriage appears clean. This may be required if the undercarriage has not been cleaned for an extended period or if you frequently drive in harsh conditions.
- Dry the Undercarriage: After rinsing, it's important to dry the undercarriage to prevent water from pooling and causing corrosion. Use a clean microfiber cloth or allow the car to air dry. If possible, take the vehicle for a short drive to help evaporate any remaining moisture.
- Consider Protective Coatings: To further protect the undercarriage from corrosion, consider applying a protective coating. There are specialized undercarriage coatings available that create a barrier against moisture and road salt. Follow the manufacturer's instructions for proper application.
Regularly cleaning the undercarriage of your car is crucial for maintaining its condition and preventing corrosion. Aim to clean the undercarriage at least a few times a year, and more frequently if you frequently drive on salted roads or encounter harsh conditions. By following these steps and giving attention to this often-overlooked area, you can ensure that your vehicle remains in optimal shape and enjoys a longer lifespan.
Removing dirt from wheels and tires: Enhancing the Look and Performance of Your Vehicle

When it comes to maintaining your vehicle's appearance, one area that often requires special attention is the wheels and tires. These components are constantly exposed to road grime, brake dust, and other contaminants that can accumulate over time, affecting both the look and performance of your car. Regularly removing dirt from wheels and tires is essential to keep them looking their best and ensure optimal functionality. Here's a step-by-step guide on how to effectively remove dirt from wheels and tires:
- Preparing for Cleaning: Before you begin, gather the necessary supplies. You'll need a bucket of soapy water, a wheel cleaner (specifically designed for your wheel type), a tire brush or stiff-bristled brush, a sponge or microfiber cloth, and a hose with a high-pressure nozzle.
- Rinse Off Loose Debris: Start by rinsing the wheels and tires with a strong stream of water. This helps to remove loose dirt, dust, and any other debris that may be present. Use the high-pressure nozzle or a dedicated wheel cleaning attachment to reach into tight areas and dislodge stubborn dirt.
- Apply Wheel Cleaner: Once the wheels are rinsed, apply a wheel cleaner according to the manufacturer's instructions. Make sure to choose a cleaner that is appropriate for the type of wheels you have (e.g., chrome, alloy, or painted). Apply the cleaner to one wheel at a time, ensuring complete coverage.
- Scrub the Wheels: Using a tire brush or stiff-bristled brush, scrub the wheels thoroughly. Pay close attention to the spokes, crevices, and any areas with heavy dirt buildup. Apply moderate pressure while scrubbing, but avoid using excessive force to prevent scratching or damaging the wheels. If necessary, use a small detailing brush to reach tight spots.
- Clean the Tires: While the wheel cleaner is working on the wheels, shift your focus to the tires. Dip the tire brush or stiff-bristled brush into the soapy water and scrub the tires vigorously. Pay attention to the sidewalls and any lettering or raised areas on the tires. Use back-and-forth or circular motions to ensure thorough cleaning.
- Rinse Off the Cleaner: After scrubbing the wheels and tires, rinse them thoroughly with water. Use the high-pressure nozzle to remove all traces of the wheel cleaner and soapy water. Ensure that all dirt and cleaning product residue are completely washed away.
- Dry the Wheels and Tires: To prevent water spots, use a clean microfiber cloth or sponge to dry the wheels and tires. Start by drying the wheels, ensuring that all moisture is removed. Then, move on to the tires and dry them thoroughly, paying attention to the tire treads and sidewalls.
- Apply Tire Dressing (Optional): If desired, you can apply a tire dressing or protectant to enhance the appearance and protect the rubber of the tires. Choose a tire dressing that suits your preference, whether it's a glossy or matte finish. Apply the dressing evenly using a sponge or applicator pad, following the instructions on the product.
By regularly removing dirt from wheels and tires, you not only improve the visual appeal of your vehicle but also maintain the performance and longevity of these crucial components. Following these steps will help keep your wheels and tires in top condition, ensuring a clean and well-maintained look for your vehicle. Remember to exercise caution when scrubbing to avoid damaging delicate wheel finishes, and always follow the manufacturer's instructions for any specific wheel or tire cleaning products.
Ensuring thorough rinsing: The Key to a Spotless Car Wash

After completing the washing and cleaning steps of your car wash, ensuring thorough rinsing is essential to achieve a spotless finish. Proper rinsing helps remove any remaining dirt, soap residue, or cleaning products, leaving your vehicle looking clean and shiny. Here's a step-by-step guide on how to ensure thorough rinsing during your car wash:
- Assess Your Progress: Before proceeding with rinsing, take a moment to assess your vehicle's surface. Look for any areas that may still have visible dirt, soap residue, or cleaning products. Identifying these areas will help you concentrate on them during the rinsing process.
- Select the Appropriate Nozzle: At the self-service car wash station, choose the appropriate nozzle or setting for rinsing. Most stations offer a high-pressure rinse option, which is ideal for effectively removing dirt and soap residue. Ensure that the nozzle is securely attached to the hose and that it is set to provide a strong and focused stream of water.
- Start from the Top: Begin rinsing your vehicle from the top and work your way down. Starting from the roof, windows, and windshield allows the water to naturally flow downward, carrying away dirt and debris as it cascades. As you move to the hood, trunk, and sides of the car, continue the top-down approach.
- Use a Sweeping Motion: Hold the rinsing nozzle at a suitable distance from the surface of your vehicle. Use a sweeping motion, moving the nozzle back and forth or in circular motions, to cover each section thoroughly. This sweeping motion helps ensure that all areas receive adequate rinsing and that no soap residue or dirt is left behind.
- Pay Attention to Difficult Areas: Give special attention to difficult areas where dirt and soap residue can accumulate. These areas include door jambs, wheel wells, undercarriage, and crevices. Direct the water stream into these areas to dislodge any trapped dirt or soap residue.
- Rinse Wheels and Tires: Don't forget to thoroughly rinse your wheels and tires. Aim the water stream directly at the wheels and tires to remove any remaining soap or cleaning product residue. Pay attention to the inner sections of the wheels, where dirt can often accumulate. Ensure that all traces of cleaning products are rinsed off to avoid potential damage to the wheels or tires.
- Check for Residue: After rinsing, inspect your vehicle's surface for any remaining residue. Look for areas that may still appear soapy, have a cloudy appearance, or show streaks. If you notice any residue, repeat the rinsing process in those specific areas until they are completely clean.
- Spot-Free Rinse (Optional): If available at the self-service car wash station, consider using a spot-free rinse option. Spot-free rinse water is usually treated to remove minerals and impurities that can cause water spots as the car dries. This optional step helps minimize the need for additional drying and ensures a cleaner final result.
By following these steps and ensuring thorough rinsing, you can achieve a spotless finish for your vehicle. Proper rinsing removes any remaining dirt, soap residue, or cleaning products, leaving your car looking clean, shiny, and ready to hit the road. Take your time, pay attention to difficult areas, and enjoy the satisfaction of a thoroughly rinsed and refreshed vehicle.
Drying Your Car

- Using microfiber towels: Once you have rinsed your car, it's time to dry it to avoid water spots. Use clean and absorbent microfiber towels for this purpose.
- Starting from the top and working your way down: Begin drying your car from the top, working your way down to the lower areas. This prevents any dirt or debris from being dragged across the paintwork.
- Paying attention to windows and mirrors: Use a separate microfiber towel to dry the windows and mirrors. This helps eliminate streaks and ensures clear visibility.
- Avoiding water spots: If you notice any water spots, you can use a quick detailer spray or a clean microfiber towel to remove them. Gently wipe the affected areas until the spots disappear.
Additional Tips and Techniques

- Cleaning the interior: While self-service car washes primarily focus on the exterior, you can also clean the interior of your vehicle. Vacuum the carpets and upholstery, wipe down surfaces with a mild cleaner, and use glass cleaner for the windows.
- Waxing and polishing: After washing and drying your car, you may consider applying wax or polish to protect the paint and give it a glossy finish. Follow the instructions on the product and use a soft cloth or applicator pad for application.
- Vacuuming the carpets and upholstery: In addition to washing the exterior, self-service car washes often provide vacuum stations where you can clean the interior. Take advantage of this by thoroughly vacuuming the carpets, seats, and any other upholstered surfaces.
Conclusion
Using a self-service car wash allows you to take control of the cleaning process and achieve professional-looking results at an affordable price. By following the steps outlined in this article, from washing and rinsing to drying your car, you can keep your vehicle in pristine condition while enjoying the satisfaction of a job well done.
FAQs
- How often should I wash my car? It is generally recommended to wash your car every two weeks to remove dirt and contaminants that can harm the paint. However, you may need to wash it more frequently if you live in an area with harsh weather or if your car is exposed to road salt or tree sap.
- Can I use regular household soap to wash my car? It's best to use a car wash soap specifically formulated for vehicles. Regular household soap may contain ingredients that can strip away wax and damage the paint.
- Are self-service car washes environmentally friendly? Self-service car washes are often designed to be more environmentally friendly than traditional car washes. They typically use less water and incorporate systems to capture and recycle water.
- Can I wash my convertible with a self-service car wash? Yes, you can wash a convertible at a self-service car wash. However, make sure the top is properly secured and follow the manufacturer's guidelines to prevent any water leakage into the interior.
- Is it safe to use a pressure washer on my car's paint? Using a pressure washer can be safe as long as you maintain a safe distance and use the appropriate nozzle or setting. Avoid holding the pressure washer nozzle too close to the paint to prevent damage.
- Do I need to bring my own towels to a self-service car wash? It's recommended to bring your own microfiber towels for drying your car. While some self-service car washes provide towels, they may not always be of the best quality.
- How much does it cost to use a self-service car wash? The cost of using a self-service car wash can vary depending on the location and the services offered. It is generally more affordable compared to professional car washes.
- Can I use a self-service car wash in cold weather? Yes, self-service car washes are generally available year-round, including during cold weather. However, be cautious of freezing temperatures, as water can freeze on your car's surface and cause damage.
- Are self-service car washes safe for new cars? Yes, self-service car washes are safe for new cars. Just make sure to follow the proper washing techniques and use gentle cleaning products to avoid any potential damage.
- What should I do if the self-service car wash is crowded? If the self-service car wash is crowded, you can either wait for your turn or consider coming back at a less busy time. It's important not to rush the process to ensure thorough cleaning.
- Can I wash my motorcycle in a self-service car wash? Yes, self-service car washes can be used to wash motorcycles. However, be mindful of the water pressure and adjust it accordingly to prevent damage to delicate parts.
- Are self-service car washes suitable for large vehicles? Self-service car washes can accommodate most large vehicles, including SUVs and trucks. However, it's important to ensure that your vehicle fits comfortably within the washing bay before proceeding.
- Can I wash my car's engine at a self-service car wash? It is generally not recommended to wash your car's engine at a self-service car wash. Engines are sensitive to water and require special care. Consult a professional or use specialized products for engine cleaning.
- How long does it take to wash a car at a self-service car wash? The time it takes to wash a car at a self-service car wash can vary depending on several factors, such as the size of the vehicle and the level of dirtiness. On average, it may take around 30 minutes to an hour.
- Are self-service car washes open during the night? Self-service car washes may have varying operating hours, but some are open 24/7 for customer convenience. Check with your local self-service car wash for their specific operating hours.